

Boost Your Golf Game with Two Key Moves for Effortless Swing Speed! Discover how to effortlessly increase your golf swing speed and improve ball striking by mastering two crucial techniques—storing your swing angle and syncing your trail leg. These simple yet effective strategies will help eliminate common mistakes, prevent early flipping, and enhance your ball compression. Follow our comprehensive guide for drills that you can practice at home or on the driving range to transform your game.
Boost Your Golf Game with Easy Techniques
If you want to add effortless speed to your golf swing and improve ball striking immediately, focus on two simple principles: store the angle and release it at the right time, and get your trail leg to the finish line before your hands. These two moves alone will fix many common flaws, stop you from flipping early, and help you compress the ball more consistently. This guide walks you through practical, step-by-step golf drills you can use at home or on the range, how to feel the move, how to measure progress, and how to transfer it into real shots.
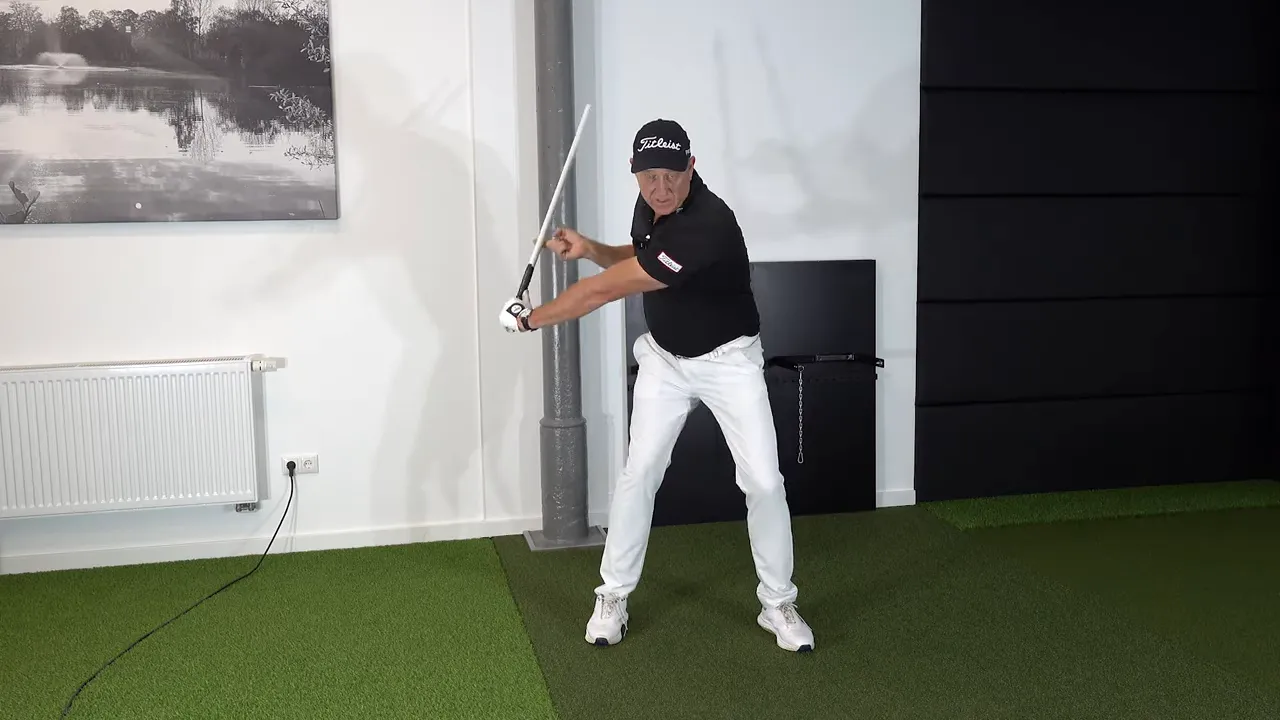
Table of Contents
- Step 1: Build the Lever — Wrist Hinge for Effortless Golf Speed
- Step 2: Hear and Feel the Release with a Click or Snap Training Aid
- Step 3: Perfect the Timing—Harness Rhythm, Sequence, and Timing
- Step 4: The Finish Line — Trail Knee Beats the Hands
- Step 5: Feeling the Trail Knee Transition Using a Rope or Drill
- Step 6: Sync Your Body with the Slap-the-Leg and Hands-Down-the-Wall Drills
- Step 7: Grip Variations — Use Stronger Grips for More Hinge
- Step 8: Track Your Progress with Technology and Benchmarks
- Step 9: Weekly Drill Routine—Turning Feel into Results
- Step 10: Apply Skills on the Course—Perform Under Pressure
- Final Checklist for Practice Sessions
Step 1: Build the Lever — Wrist Hinge for Effortless Golf Speed
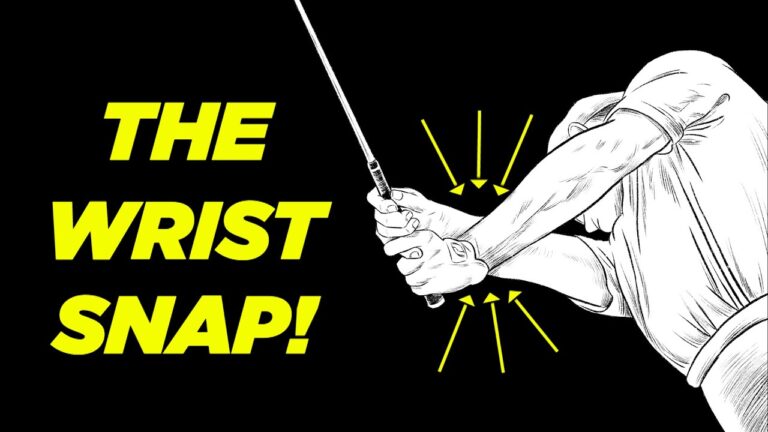
Start by understanding leverage. The biggest single reason amateurs lose speed is because they remove the lever they created in the backswing. If you want effortless speed, you must build and keep a strong angle between the club shaft and your lead arm through the top of the swing. The bigger that angle is, the more clubhead speed you can produce when you release it correctly.
Here is the simple feeling to create. At the top, let your wrists hinge and create a clear wrist angle. Think of the club as a lever. If you hit without that lever, you will rely on arm and body muscles instead of stored elastic energy. Store the angle and then let it snap. When you practice this, you are training the system to use stored energy rather than brute force.
Key checkpoints to look for at release:
- The grip end points upward before your hands pass your torso.
- Your lead arm and club form a clear V shape in the downswing.
- You allow the wrist to unhinge rather than forcibly roll the hands early.
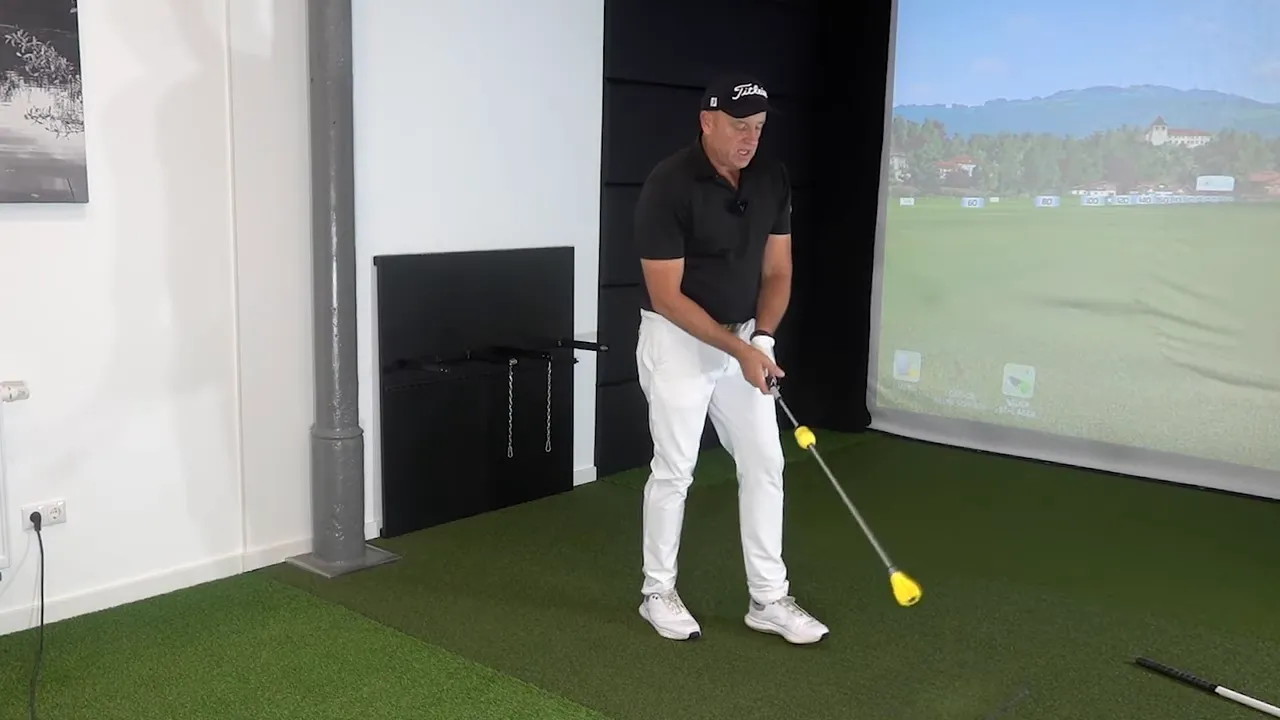
One clean cue you can use: hook the training stick into your index finger at the top, reconnect your elbow on the downswing, and let the end of the grip unhinge. That unhinging is the release that produces effortless speed.
Step 2: Hear and Feel the Release with a Click or Snap Training Aid
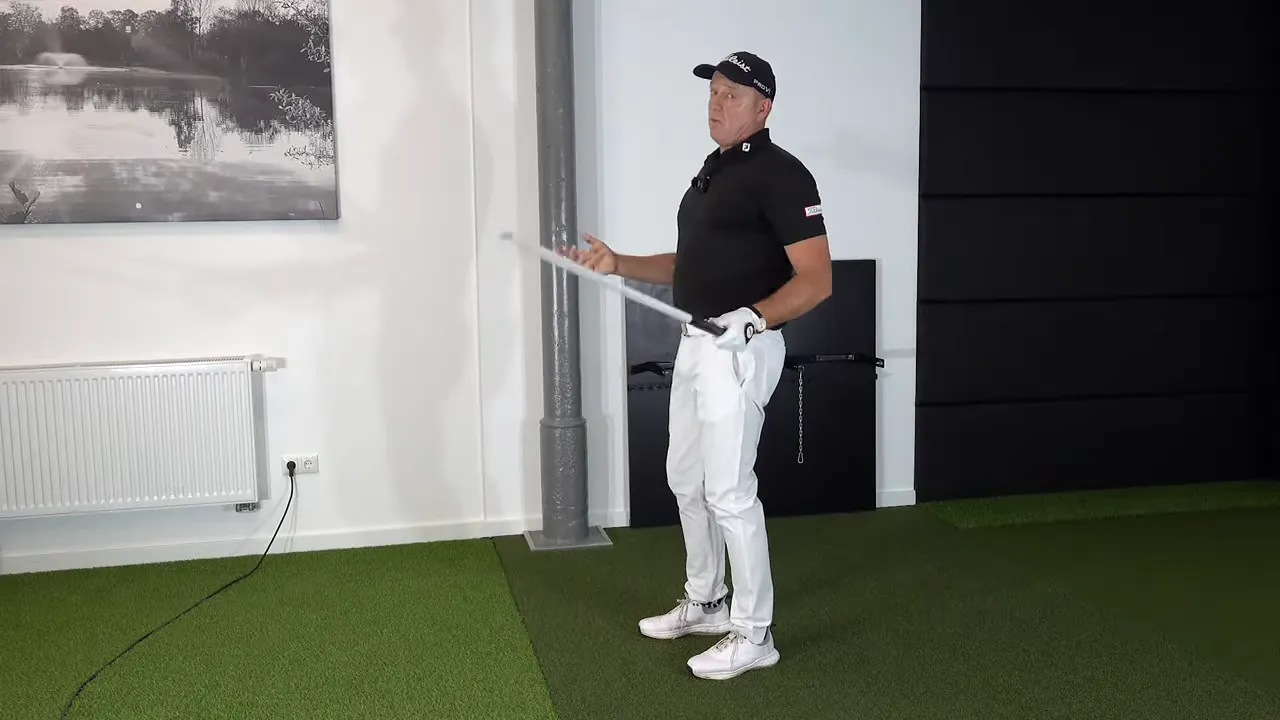
Auditory feedback accelerates learning. Use a training club or even a lightweight piece of plastic with a click or snap built into it. Swinging a tool that clicks when it releases gives you binary feedback: released too early, released too late, or released just right.
How to practice with the click tool:
- Take slow to medium paced swings to start.
- At the top, hook the tool into your index finger so the pressure keeps the lever set.
- On the downswing, reconnect your elbow and allow the wrist to unhinge so the tool clicks.
- Listen for the click to happen just before or at impact position for the correct feel.
- Repeat and gradually add speed as the timing solidifies.
This drill is especially useful for senior players or anyone who wants to reduce wear and tear because the lighter tool is easier to repeat than a metal club. The click is not magic, but it gives you the immediate cue your brain needs to reprogram the timing of your release.
Step 3: Perfect the Timing—Harness Rhythm, Sequence, and Timing
Golf is a timed sequence. You cannot force speed; you create it by sequencing correctly. The key is not to flip with the hands early. Instead, wind up the body, start the downswing with the lower body and the knees, and wait for the stored wrist angle to unhinge. When you let it go at the correct moment the clubhead accelerates naturally.
Repeating the mantra will help you internalize the right rhythm: wind up, pause, lead with the legs, let the hinge snap, and follow through. You will hear players and coaches say it in different ways. One clear teaching line to remember is this: the swing’s got a lot of timing. You have to time it.
- Tempo and pace come before speed.
- Practice slower swings with perfect timing, then add speed while holding the timing pattern.
- Use a metronome or count in your head to keep rhythm consistent during drills.
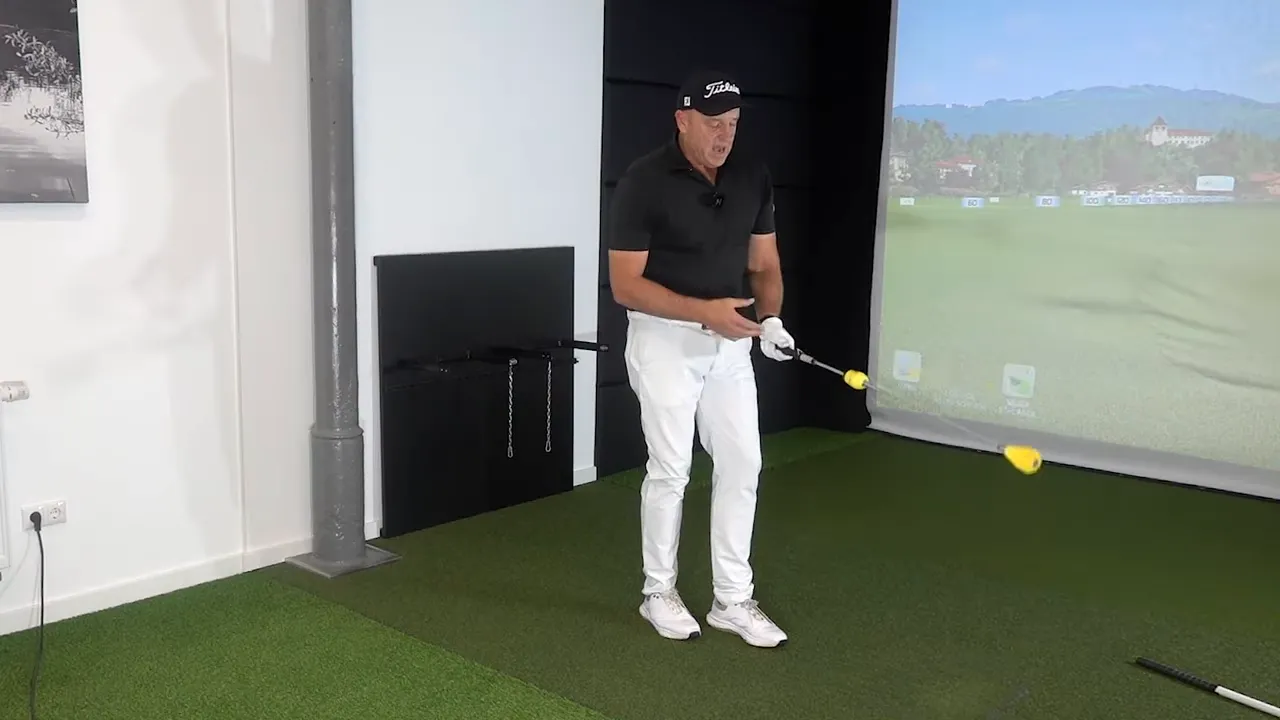
Step 4: The Finish Line — Trail Knee Beats the Hands
Here is the overlooked move. Every top player gets their trail knee to the finish line before their hands do. Most amateurs get the hands ahead of the trail knee, which forces a collision course and causes early flipping, poor compression, and inconsistent contact.
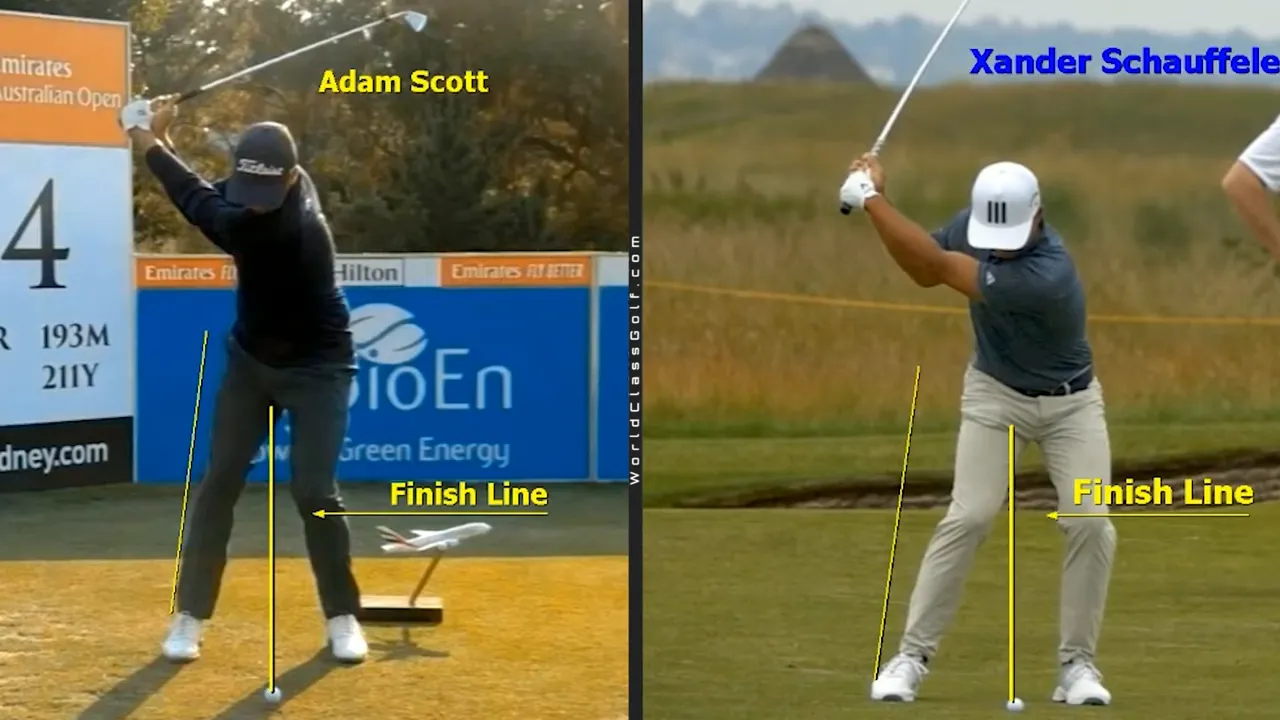
What is the finish line feeling?
Imagine a line across the top of your lead hip. Your trail knee should move forward and cross that plane before your hands get there. That forward movement of the trail knee triggers a chain reaction: it helps transfer weight, it allows the hips to clear properly, and it creates separation between hips and shoulders. That separation is where speed is born without extra effort.
Hands-first swings often end in an early release and a standing-up action. But if your knee beats your hands, you will naturally get better compression and a whip-like release. That is true effortless speed.
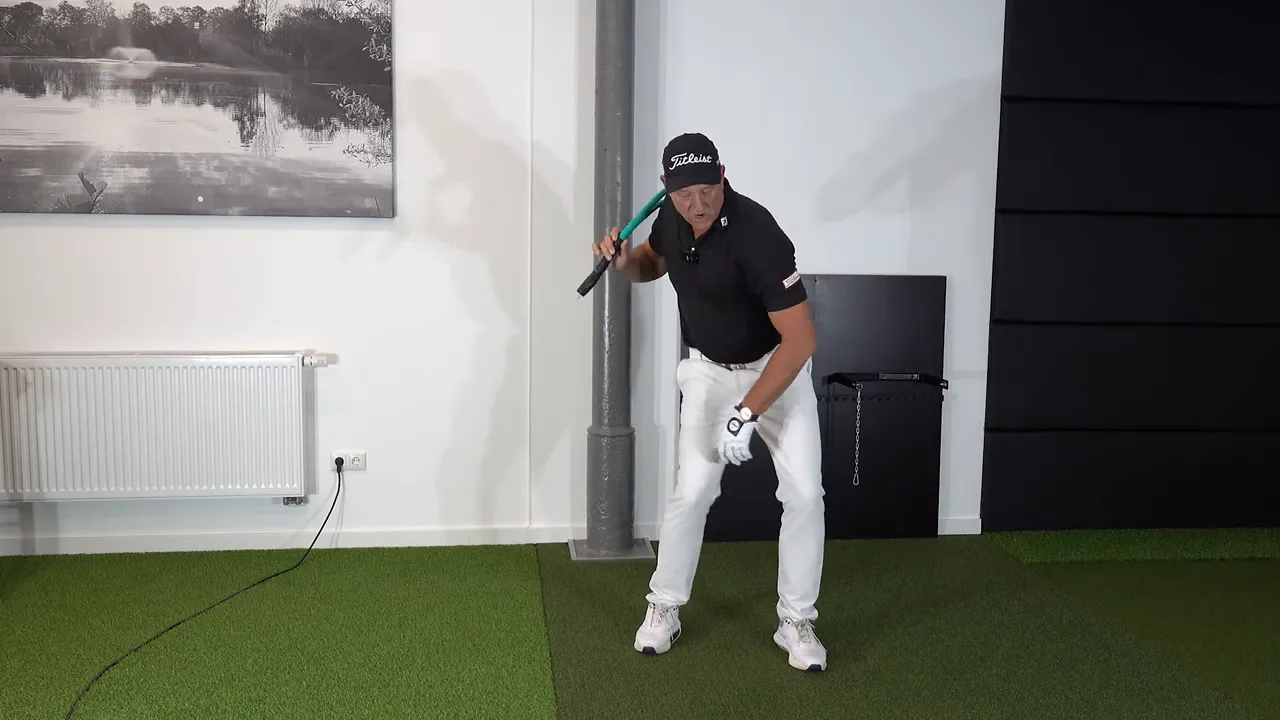
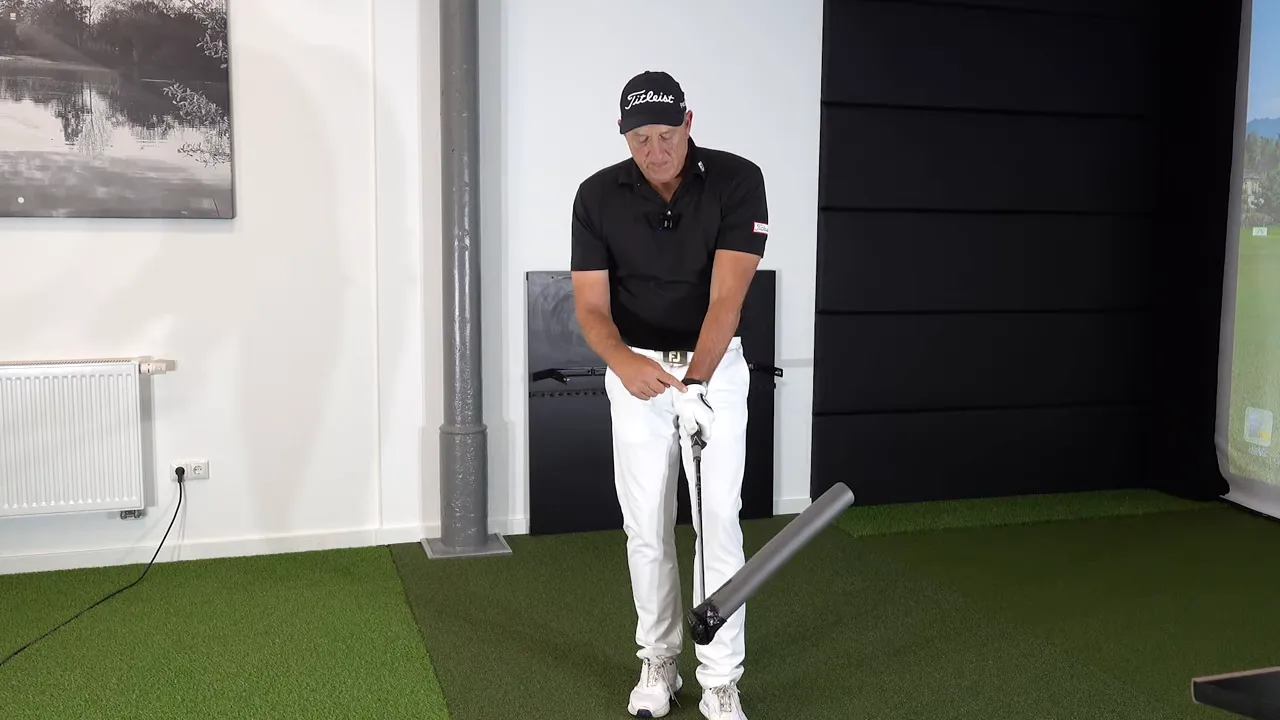
Step 5: Feeling the Trail Knee Transition Using a Rope or Drill
Practice the trail knee move with a rope or an anchored training aid to control the timing. The rope drill gives you a light pause at the top, and then you start the downswing by shifting the knees. This prevents an early body rotation that causes spinning instead of turning.
Rope drill progressions:
- Set a short rope or training aid across your shoulders or hold it across the back as you swing to feel the top pause.
- Take your normal backswing and feel the rope drop at the top so you get a micro-pause.
- Start the downswing by driving the trail knee toward the target while keeping the upper body stable.
- Pair the knee drive with a pull of the hands down the plane, creating separation rather than collision.
- Finish with the trail knee across the finish line before the hands arrive.
Important coaching notes:
- Do not let the knee move too early; the pause at the top keeps the timing correct.
- Drive the knee forward, not sideways. The goal is to close the gap between knees and create forward momentum.
- Make the movement feel like a small, powerful step forward rather than a large lateral shift.
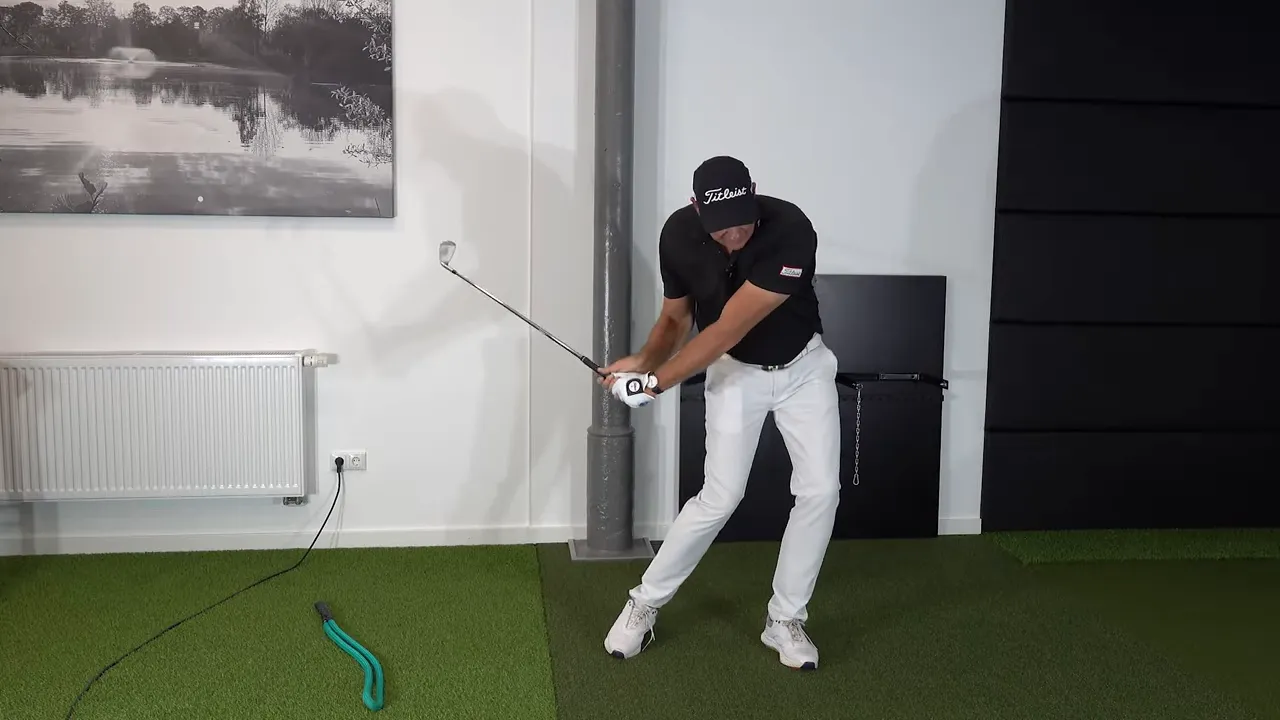
Step 6: Sync Your Body with the Slap-the-Leg and Hands-Down-the-Wall Drills
To get the timing of the knee and hands right, employ a simple drill your coach may have used: swing back and slap the leg at the start of the downswing. The sound and sensation create a timing cue that encourages the lower body to initiate movement. Another useful feeling is to slide the hands down an imaginary wall without the hands moving away from the body. That keeps the arms connected and late in the release.
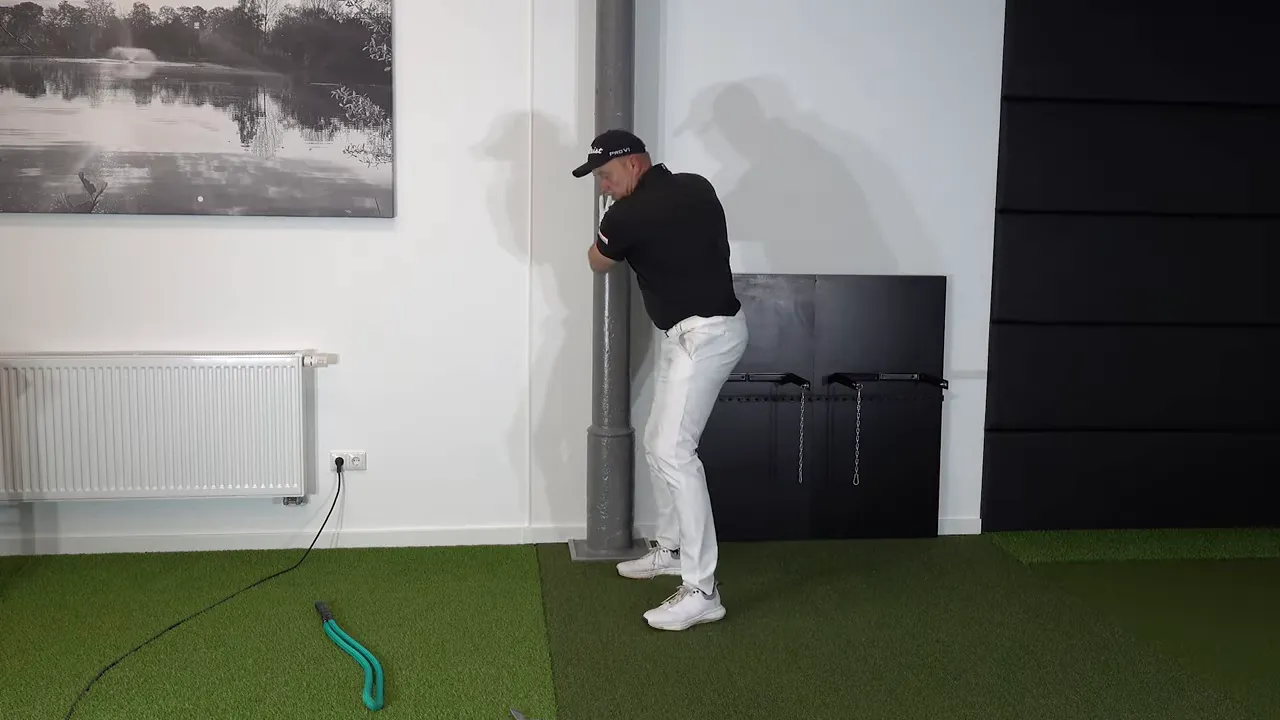
How to perform the hands-down-the-wall cue:
- Take the top of your swing and visualize a wall in front of your torso.
- Start the downswing by moving your trail knee forward and simultaneously slide your hands downward along the wall; do not let the hands push away from the chest.
- Feel the separation as your lower body moves and your upper body lags slightly behind.
- Allow the wrists to unhinge as the arms move through the wall plane, producing the whip through impact.
These coordinated cues build the feel for the hands staying connected until the correct release moment. When the hands slide down without moving away, the wrists are free to snap through at the bottom instead of getting forced into a flip.
Step 7: Grip Variations — Use Stronger Grips for More Hinge
Not every swing is the same, and grip plays a big role in release patterns. A slightly stronger grip can promote more hinge and higher stored angles, which can be beneficial if you struggle to create wrist angle or if you under-hinge in the backswing.
What a stronger grip does:
- Encourages the clubface to sit more closed relative to the hands on the takeaway and at the top.
- Reduces the need to fully roll the forearms at release to square the face, allowing a more under-release feel.
- Can aid players who naturally open the face too much on the way back or who lack hinge.
When to try a stronger grip:
- If you cannot create a strong wrist hinge in the backswing.
- If you struggle to maintain clubface control through impact with irons.
- If you are experimenting with more stored angle and need a different release feel.
Be cautious: the driver may behave differently because you are hitting on the upswing and standing further from the ball. Test feels on the range: stronger grip may require a slightly different release on driver versus irons. The instruction is to experiment rather than assume the same setup fits every club.
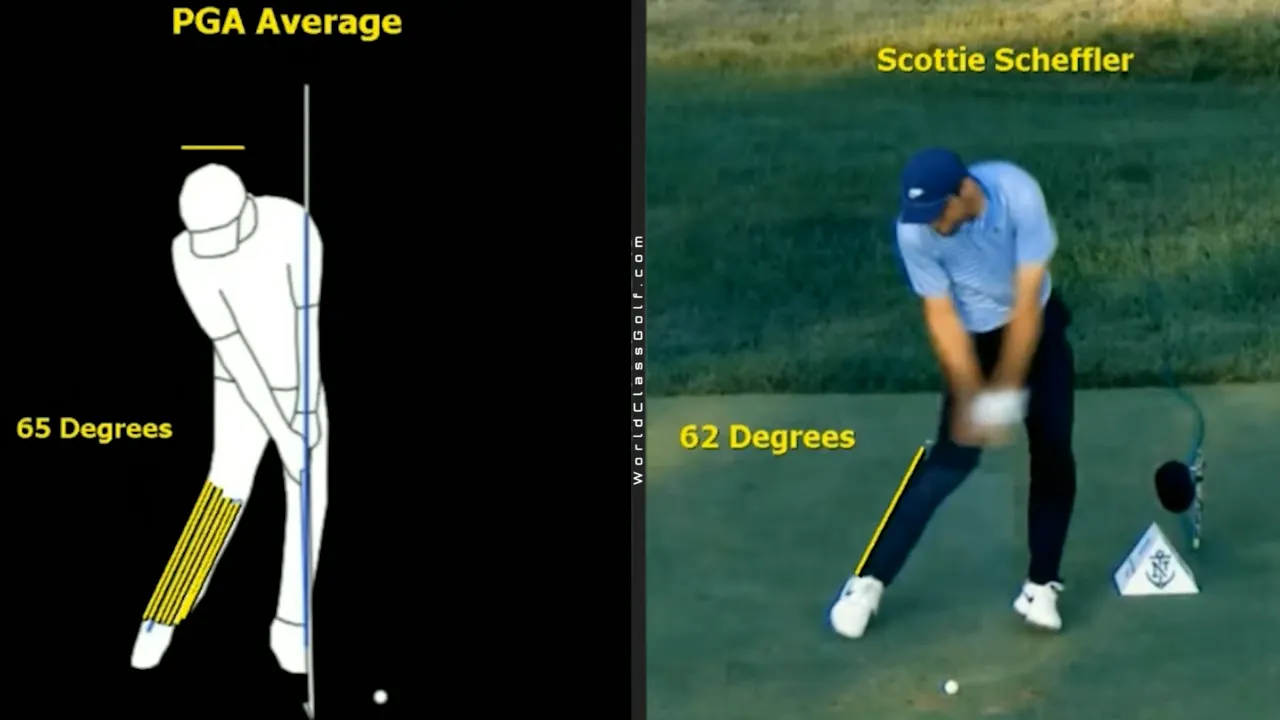
Step 8: Track Your Progress with Technology and Benchmarks
Measuring movement and timing objectively speeds improvement. There are apps and tools that give you swing averages from tour players so you can compare. A useful benchmark is the angle of the trail leg: measuring the angle from the knee to the ankle at impact can tell you if you are in the same range as elite ball strikers.
Evidence-based benchmarks to track:
- Trail leg angle under 70 degrees from knee to ankle at impact is a common trait of top players.
- Clubhead speed versus previous sessions to confirm whether training is increasing speed without sacrificing contact.
- Ball flight and dispersion patterns after implementing the release and finish line drills.
Tools to help you measure:
- Video analysis apps to check sequencing and knee position at impact.
- Launch monitors to check ball speed and smash factor when you change release timing.
- Sensor-based systems that measure wrist hinge and release timing to give instant feedback.
Step 9: Weekly Drill Routine—Turning Feel into Results
To make these changes sticky, structure your practice into short, focused sessions. Here is a simple weekly routine you can use to build the lever, the release, and the finish line habit.
- Warm-up: 10 minutes of mobility work focusing on hips, ankles, and thoracic rotation.
- Grip and hinge practice: 10 minutes with a click training tool, 50 swings. Emphasize a strong wrist angle at the top and listen for the click around impact.
- Trail knee sequence: 10 minutes of rope or leg-drive drills. Do 40 reps of the knee-beats-hands motion at reduced speed.
- Hands-down-the-wall or slap-the-leg drill: 10 minutes. Sync the lower body with arm delivery. Use slower swings to ingrain feel.
- Ball-striking block: 20 minutes of half to three-quarter swings with irons. Focus on compression and feel, not distance. Keep a launch monitor if available to monitor ball speed and smash factor.
- Full swing integration: 15 minutes of full swings with driver and woods, testing grip variations and release timing.
- Reflection and video: 5 minutes recording and reviewing 2-3 swings to ensure the trail knee is beating the hands and the release is late and free.
Short, consistent practice of these drills will create neural patterns that make the movements automatic under pressure.
Step 10: Apply Skills on the Course—Perform Under Pressure
On the course, your goal is to find a simplified version of the practice feelings you used on the range. Under pressure, you will compress sensations, so use compact cues:
- Pre-shot: visualize the trail knee moving to the finish line first.
- Address routine: take one meaningful breath to calm tempo and remind yourself of the click or snap feel.
- During the swing: allow the hinge to release without trying to force it. Trust the timing cue you practiced.
- After impact: check ball flight and brief self-assessment—did the hands flip? Did the knee beat the hands? Adjust next shot accordingly.
Remember, under pressure, you will tend to speed up. Anchor your swing with a pre-shot routine that emphasizes rhythm. If you feel yourself rushing, take one more breath and repeat the slow feeling twice before committing.
How long will it take to feel a real change in golf distance and ball striking?
You can often feel immediate changes in the first practice session when you start releasing the stored hinge correctly and getting the trail knee to the finish line. Noticeable and repeatable gains normally take several weeks of consistent, focused practice. If you follow a structured routine and use feedback tools, many players see measurable improvement within 4 to 8 weeks.
Will a stronger grip always help me hit the ball further in golf?
A stronger grip can help certain players create more hinge and store more angle, which may increase clubhead speed and control with irons. However, it is not a universal fix. The driver often behaves differently because of distance from the ball and the upswing delivery. Try gradual changes and test ball flight and face control to decide what works for you.
What if I cannot create the wrist hinge at the top of the swing?
If you struggle to create hinge, start with lighter tools and practiced backswing holds. Use a training stick or short club and practice hinging to the top and holding for a moment to feel the lever. Gradually add motion and rely on auditory feedback like a click tool to train the timing. Strength and mobility work for the forearms and wrists can also help.
How do I know if my trail knee is under 70 degrees at impact?
Record your swing with video and analyze frame-by-frame at impact. Many swing analysis apps show joint angles or let you draw lines to measure the knee to ankle angle. If your trail knee to ankle angle is under 70 degrees at impact, you are in the range many tour players display. Focus on drills that drive the knee forward so it beats the hands to the finish line.
Can these drills help seniors or players with limited mobility in golf?
Yes. The principles are about sequencing and timing, not raw athleticism. Using lighter training sticks and reducing swing length can help seniors maintain the lever and train the correct release without strain. The click tool and rope drill are low impact and create the sensory feedback needed to reprogram timing and separation.
Should I roll the wrists or let them snap through the ball in golf?
You should allow the wrists to unhinge and snap through at the bottom rather than actively rolling the forearms early. Let the stored hinge release naturally. For certain shot shapes and grip strengths a slight under-release may be preferred, but the core idea is that the wrist release should occur late enough to produce compression, not as an early flip.
Final Checklist for Practice Sessions
- Create and maintain a strong wrist hinge at the top. Think lever, not a short arm swing.
- Use a click tool or lightweight trainer to train the timing of the unhinge.
- Make the trail knee cross the finish line before the hands to avoid flipping and to create separation.
- Practice rhythm and sequencing with rope and slap-the-leg drills to train lower-body initiation.
- Experiment with grip strength carefully and test driver vs irons separately.
- Measure movement with video and simple biomechanical benchmarks to track progress.
Work on these elements consistently and you will turn inefficient, strained attempts into a fluid, powerful, and repeatable golf swing. The secret to effortless speed is not trying to muscle the ball but creating stored energy and timing its release. Practice the drills slowly and deliberately, then add speed once the timing locks in. Happy practicing and hit some great shots.
0 Comments