


Unlock Effortless Iron Precision
If you’re eager to strike your irons with precision, hit them straighter, and effortlessly gain distance, you’re in the right place. I’m Danny Maude, and over my coaching years, one principle stands out — face to path. Understanding this key concept can transform your iron game, bringing consistency and power from the tee.
This comprehensive guide will teach you how to master your face-to-path setup. We’ll explore common issues leading to slices and hooks, and I’ll provide a step-by-step practice routine you can start today to improve your swing dramatically. Plus, there’s a drill to ensure your improvements are here to stay.
Table of Contents
- Outline
- Step 1: Check Your Setup to Strike Your Irons Pure
- Step 2: Reverse Your Setup to Learn the Feeling — Strike Your Irons Pure
- Step 3: Neutralize the Hands — One Small Palm Turn Before You Swing
- Step 4: Keep Face-to-Path Through the Backswing — The Hat Motion Drill
- Step 5: Practice Progression and Feedback — Lock In How to Strike Your Irons Pure
- Step 6: On-Course Adjustments and Troubleshooting
- Common Mistakes and How to Correct Them
- Practice Checklist — What to Do Every Practice Session
- Why This Approach Works — The Motor Learning Behind It
- FAQ — Strike Your Irons Pure
- Conclusion and 4-Week Practice Plan to Strike Your Irons Pure
Outline
- Step 1: Check Your Setup to Strike Your Irons Pure
- Step 2: Feel the Reverse Setup to Learn How to Hook
- Step 3: Neutralize the Hands — Small Palm Rotation Before You Swing
- Step 4: Keep Face-to-Path Through the Backswing with the “Hat Motion” Drill
- Step 5: Practice Progression and Feedback to Lock It In on the Range
- Step 6: On-Course Adjustments and Troubleshooting
- FAQs
- Conclusion and Practice Plan
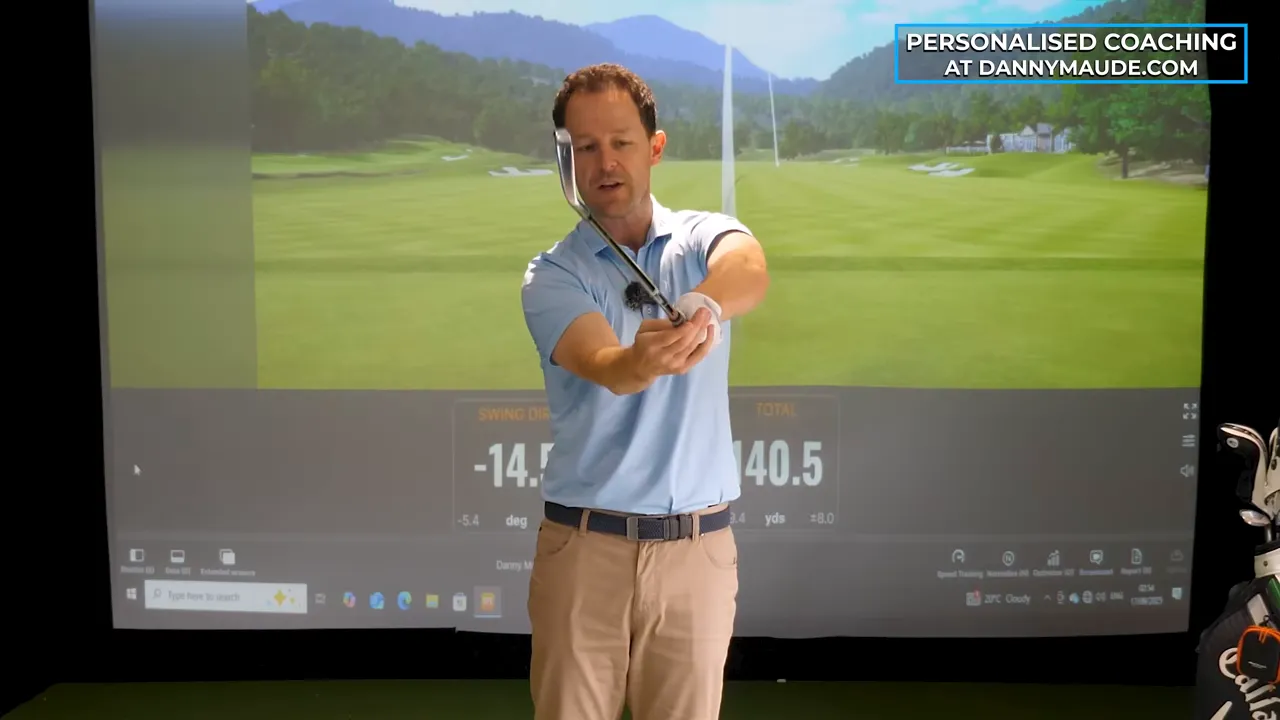
Step 1: Check Your Setup to Strike Your Irons Pure
Inconsistency often stems from your setup. If you frequently slice the ball, a slice could already be embedded in your setup. Changing your swing without a supportive setup only leads to fighting the ball.
Here’s a quick check you can do practically anywhere:
- Stand straight and extend your arms with palms down. Watch your elbows — they likely point outwards.
- Twist your palms upwards. Your elbows drop and point down.
- Adopt your regular golf grip and address the position.
- From down the line, observe your forearms. If your lead forearm (left for right-handers) is under your trailing forearm with palms turned up, you’ve likely set up for a slice.
This matters because when your lead elbow is down with a palm up, while the trail palm is down with the clubface square, it misaligns your path, often resulting in a slice.
“Many golfers inadvertently build a slice into their swing even before making a swing.”
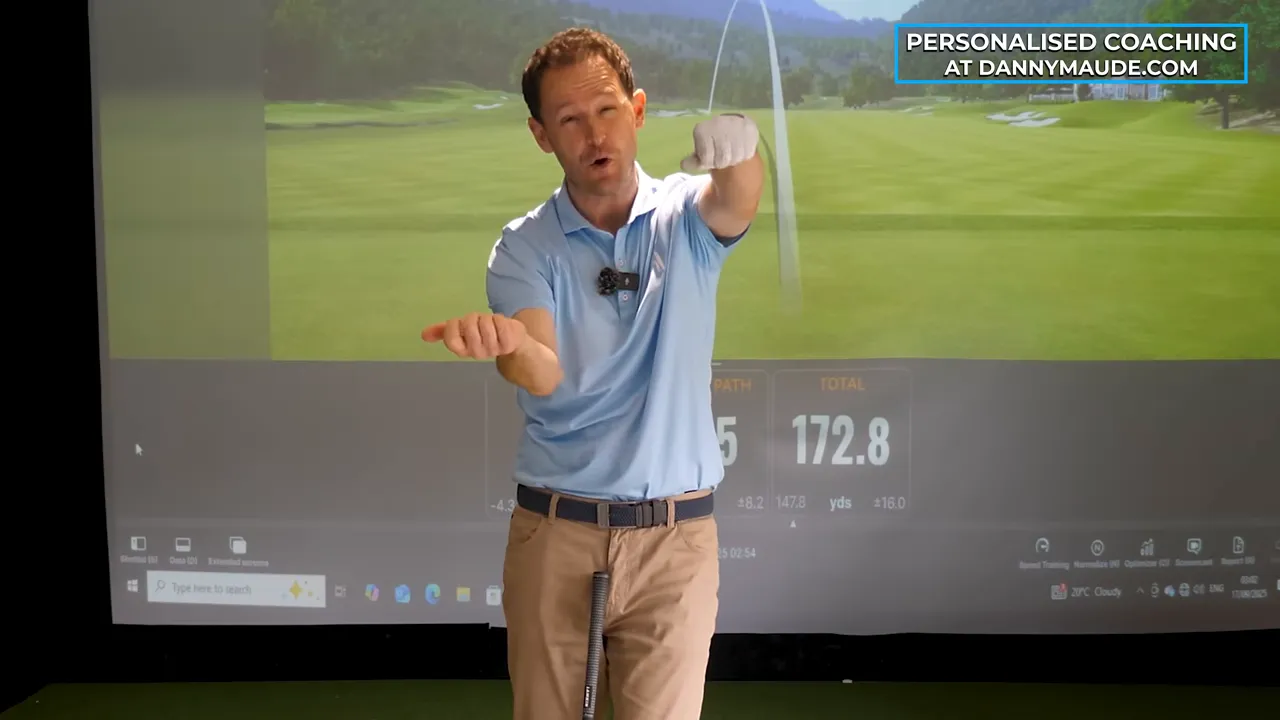
Step 2: Reverse Your Setup to Learn the Feeling — Strike Your Irons Pure
If you slice, a fantastic learning tool is to first exaggerate and learn the opposite issue — the hook. Afterward, dial back to a neutral position, which helps your motor system develop the ideal sensory understanding.
Performing the reverse setup:
- At address, rotate your lead palm downward, so the lead elbow points out.
- The trail elbow should point downward, adjusting the trail palm slightly upward.
- Despite the clubface appearing square, note your forearms now point more right (forming the path).
The result — from this new setup, your swing will likely start right and curve left (hook). It may feel strange but helps achieve balance. Once you feel the hook, tune back to neutral, aiming for zero face-to-path.
Coaching tip: Start 10–20% of practice swings with the exaggerated setup — contrast helps your system learn the middle ground.
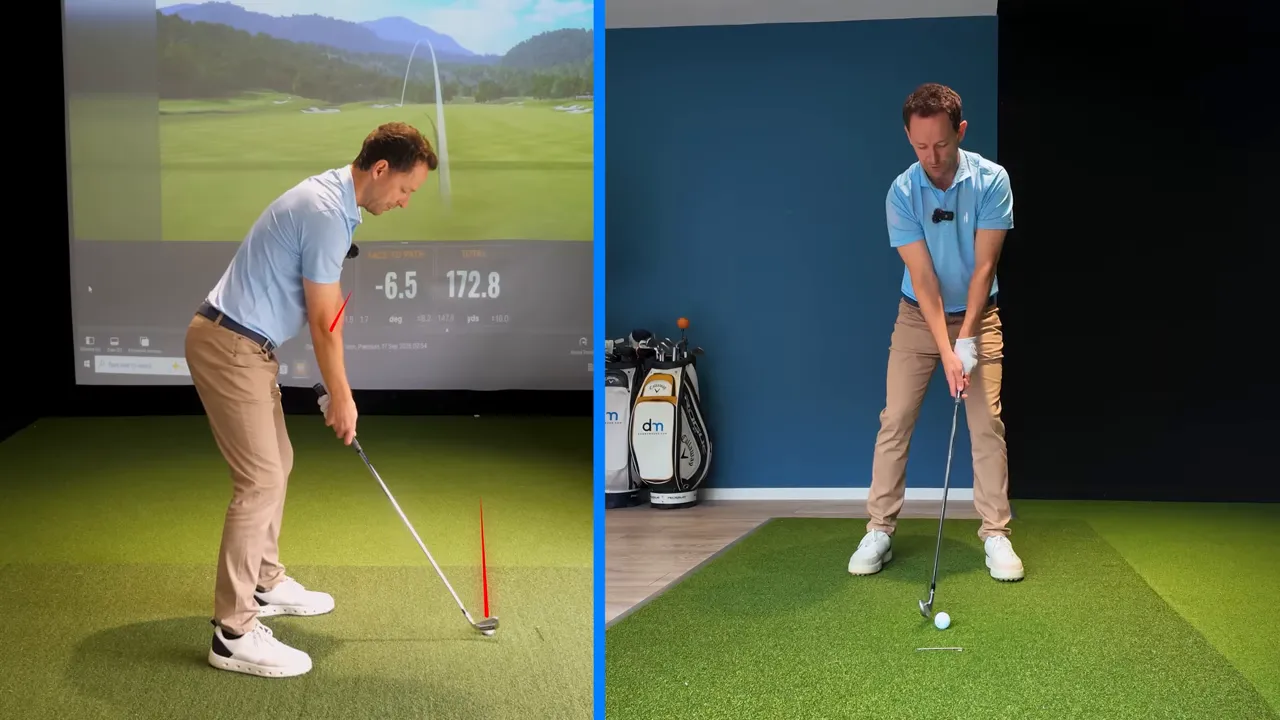
Step 3: Neutralize the Hands — One Small Palm Turn Before You Swing
Having felt both extremes, your next step is employing a small hand rotation to return towards neutral face-to-path — no drastic changes, just a subtle tweak.
Implementation steps:
- After practicing the reversal, keep elbows aligned, and rotate palms more towards the target.
- Your lead palm should aim towards rather than beneath — down but facing the line.
- Position your trailing hand more on top, preventing the clubface from massive skew.
This subtle palm rotation aligns the clubface with your forearms’ path naturally, consequently straightening your shots.
Remember: “Face on target, forearms directing the path.”
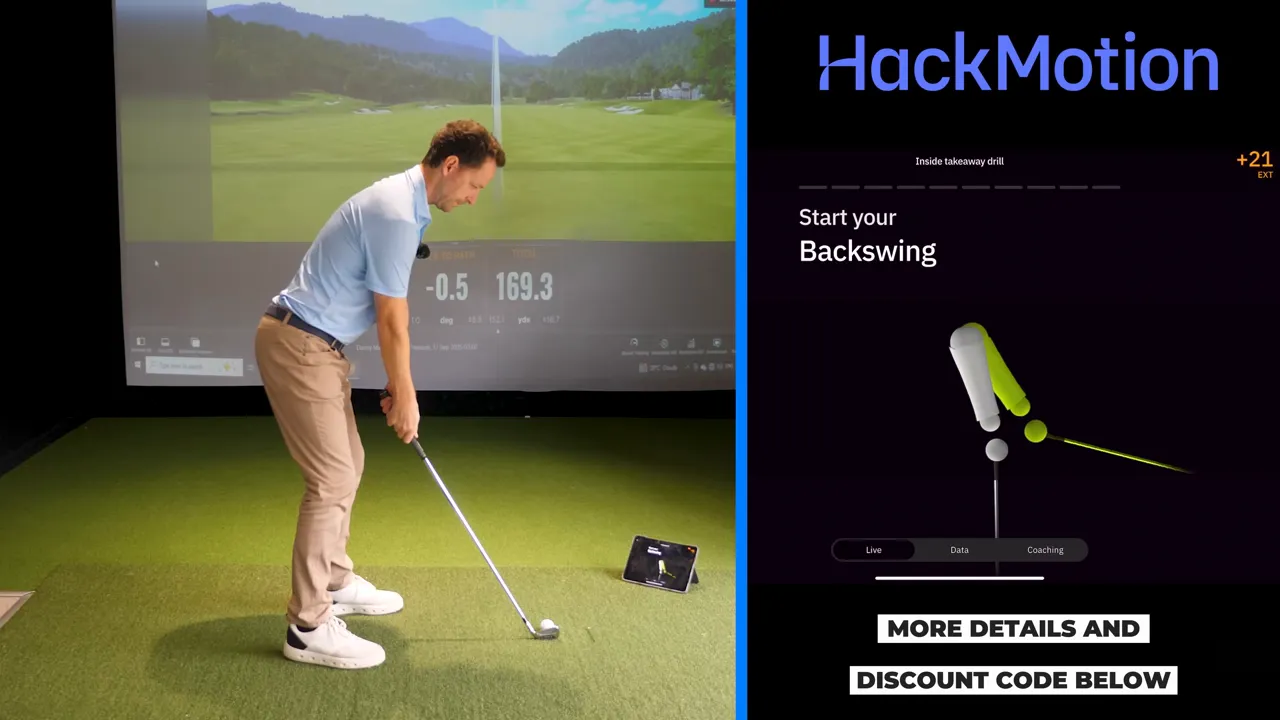
Step 4: Keep Face-to-Path Through the Backswing — The Hat Motion Drill
Retaining face-to-path through your backswing is critical. Avoid relying on hands; instead, let your body take the club around. Here’s the Hat Motion Drill, a repeatable technique that offers immediate feedback.
Hat Motion Drill Steps:
- Adopt your usual address with the iron.
- Hold the club horizontally; envision your hands as the “hat.” Keep the grip level.
- Allow the club to hinge towards your trail shoulder using only body rotation.
- Practice turning your body with natural wrist hinges — note when hands lift, not roll.
Use these cues:
- “Body rotates; hands lift.”
- “Keep the club butt level — hinge wrists, don’t flip.”
- “Let the body guide the club, hands are lifters.”
Consistency in role separation prevents face misalignment — ensuring your clubface points as expected.
Step 5: Practice Progression and Feedback — Lock In How to Strike Your Irons Pure
Technique grasped does not equal automatic application. Follow this guided practice sequence to engrain improvements.
- Warm-up: 5 minutes of club horizontal swings. Feel wrist hinge and body turn.
- Hat Motion Drill: 3 sets without a ball. Focus and self-check each time.
- Hit half shots with a 7-iron using the same cues — aiming for “face neutral.”
- Progress to three-quarter swings, maintaining the same relationship.
- Move to full swings — checking and applying the same concepts.
- Feedback: Use monitors, alignment sticks, or notes on ball flight and divots.
Don’t rush — repeat the process, leveraging contrast to solidify your skills.
Step 6: On-Course Adjustments and Troubleshooting
Taking new skills to the course reveals previous tendencies. Here’s how to address them.
When slicing recurs:
- Review setup — lead elbow down, palm up? Use reversal drill for reminders, then neutralize.
- Abbreviate swings — Shorten to enhance hand control and retain face-to-path.
When hooking or pulling begins:
- Control over-rotation; use the non-ball hat motion to recapture sensation.
- Assess palm alignment. Over-neutralized hands may need mild re-adjustment.
Compromised length:
- This indicates a lack of face-to-path release. Emphasize controlled run through without flicking.
Common Mistakes and How to Correct Them
- Mistake: Aggressively correcting the face with hands during the backswing. Fix: Use body turns around a fixed hand-level.
- Mistake: Focusing on straight shots instead of understanding path. Fix: Prioritize sensations of forearm and palm alignment.
- Mistake: Practicing in isolation or without cues. Fix: Use objective feedback and the hat motion drill visibly reveals when the face slips.
- Mistake: Pursuing perfection instantly. Fix: Allow practice errors out of the gate, blending extremes to land on neutral.
Practice Checklist — What to Do Every Practice Session
- Initial 5-minute alignment check: Ensure correct palm and elbow positioning.
- Perform Hat Motion drill — 3 sets sans ball.
- Conduct half swings using a 7-iron on 20–30 balls focusing on setup cues.
- Escalate to full swings — 20–40 ball count while conserving form.
- Simulated simulations — utilize cues on target-driven shots.
Why This Approach Works — The Motor Learning Behind It
This method advances your proficiency by focusing on:
- Contrast learning: Helping create a vivid sensory understanding through extreme opposite motions.
- Role segregation: Balancing hands and body roles, removing the hand-centric habit.
- Feedback precision: Immediate, loop-shortening indicators leading to efficient adjustments.
Memorable Quote:
“The role of the hands and arms is to work the club up and the role of the body is to work it around.”
FAQ — Strike Your Irons Pure
Q: What exactly is “face to path”?
A: The face-to-path metric measures the relation between the clubface and your swing path at impact. For straight shots, aim for this figure to be as close to zero as possible.
Q: Will changing my setup hurt my consistency?
A: Though initially awkward, deliberate progression leads to consistency. Start with extremes and refine into neutrality, improving reliability.
Q: How long will it take to see improvement?
A: Individual results vary, though marked flight differences often show in a few sessions. Cement the change through weeks’ worth of frequent, intentional practice.
Q: Should I change my grip to fix this?
A: Focus on elbow and palm cues before considering entire grip shifts; minor setup alternations often resolve the issue.
Q: Can I use this with driver and woods?
A: Absolutely. This principle supports every club’s use, with varied exaggeration to meet each range.
Conclusion and 4-Week Practice Plan to Strike Your Irons Pure
For a clear path to purer striking, follow this structured four-week regimen:
- Week 1 — Awareness: Build setup awareness, employ reverse setups, and practice hat motion drills.
- Week 2 — Integration: Grow repetition counts, seek zero close face-to-path figures through monitored practice.
- Week 3 — Repeatability: Lengthen swing intervals, simulate conditions with impact recording.
- Week 4 — Performance: Apply in-play, refining with check routines and hat motion technique during pressure scenarios.
Patience is key to turning setup skills and role independence into accurate striking. Engage consistently, gather feedback, and underscore routines with meaningful practice. Elevate your craft — fine-tune your setup and make the hat motion drill a standard component, fueling strategic confidence.

0 Comments